How to Create and Package Stickers From Scratch

Making your own stickers is an exciting, simple way to express your creativity and to see your artwork come to life. While there are so many other artists creating and selling stickers, there is always room for more. The way you design your own sticker will be different, even if you are drawing something similar. The design possibilities are endless when it comes to stickers, so don’t be afraid to explore and experiment the stickers you want to make.
When I first started digitally drawing, I did not think my art would be good enough for anyone to buy my stickers. Today, my boba cat sticker is still my bestselling product and the most favorited among my products. Also, stickers have been a great way to meet new artists and build connections with other artists in the community. A simple exchange of a single sticker between two artists can lead to long-lasting friendships. This is all to say that creating stickers can be more than just making a sticker; it can lead to new friendships and can inspire others to make their own stickers too.
Stickers can also be an affordable way to kickstart your art business, if you decide to start selling them online or at a physical setting. You don’t need to invest in a Cricut machine yet and you can get your stickers printed online if you are still testing the waters. One thing about stickers I’ve learned is that many people (both adults and kids) love stickers in general and receiving one for free has brought so many smiles and joy. It has been so rewarding to see how a small piece of art can really lighten someone else’s mood and make their day. I know it can happen for you too!
To start drawing a sticker design, you will need a digital illustration app and a tablet. I personally use an iPad air (3rd generation) with an Apple Pencil (1st generation) and the Procreate app to draw. Items that I have used to create and package stickers are listed below:
100 lb white cardstock paper
4x6 clear plastic sealable bags (size is dependent on sticker size)
Color printer
Paper cutter (optional but very useful for clean, straight cuts)
Optional items: a logo sticker and a business card to include in the packaged sticker.
Let’s begin!
Step 1: Designing Your Sticker
When it comes to designing your first sticker, it is important to not overthink it and keep it simple. If the intent is to sell, consider including a popular element that people already love (mine was boba). Also, any niche, specialty designs that shows your unique style and intent can also make your sticker stand out as well. Since my art revolves around promoting positivity, I included a rainbow and a sun in my sticker, which are rare to see with a boba drink. Of note, be careful to avoid drawing things or characters that are copyrighted if you do plan on selling the sticker.
If you would like to print your stickers online, it’ll be helpful to know the available sticker sizes they offer so you can set up your digital canvas and draw the sticker appropriately for print. It is also important to know their color profile so the colors of your printed stickers will closely match to how you drew and imagined it. For my stickers, I print my stickers online at 3”x3” size using RBG color profile. I have found that the 3” size is the ideal size for my artwork that can show enough details and can fit nicely at the back of a phone, canteen, etc. I tested a 2”x2” size previously and found that it was too small.
Once you have the canvas and color profile set up on your digital canvas, brainstorm a couple of ideas that work with your personality and style. Create a few design ideas that you enjoy drawing because this will help you get over any mental hurdles or roadblocks. While drawing, keep in mind of the sticker edges and border. The shape of the sticker can impact the look and feel, so be sure to sketch out the border to get an idea of what the finished sticker will look like. I share the process of designing my boba cat sticker in this video tutorial below:
One bonus tip I would like to share is to consider creating a set or a bundle of stickers with a common theme instead of a single, stand alone sticker. Sticker sets are incredibly popular and can potentially allow you to sell more at a time. You can use a consistent color theme and style in the sticker set, which will help make these stickers more unique. As an example, the following image shows a set of positive vibes sticker bundle that I created earlier this year. Alternatively, you can also consider creating a sticker sheet as well.

Step 2: Print Your Stickers
Once you have finished creating your sticker, you can proceed to printing them next. If you have your own Cricut machine (or other printing machine), you can print them yourself at home. Because I personally do not have a Cricut machine, I get my stickers printed online.
To get your stickers printed online at an affordable price, a talented artist friend recommended using VinylDisorder.com. They are U.S. based, regularly have discounts, and have great customer service. They offer custom die cut vinyl stickers, sticker sheets, circle stickers, and more. You can also choose to receive an online proof before they print, to ensure your stickers are cut to shape and are in the right color. The only draw back is that it does take some time for your stickers to get delivered, especially during peak seasons. From my experience, it can take around two weeks or so to receive an order with standard shipping. If you decide to print your stickers from this site, be prepared for the potentially long lead time.
One other online printing shop I have used is Sticker Mule. Getting your stickers printed here may get expensive, but they sometimes have deals to get 10 stickers at a reasonable price. They also have fast lead times and can deliver quickly. In general, they have good quality stickers and can also provide proof prior to printing.
I recommend getting your stickers printed with a matte finish rather than gloss. A matte finish adds a nice touch to your sticker and won’t leave a fingerprint residue on the sticker. Because of the shine of a gloss finish, residue can be left and seen on the sticker.
Step 3: Create a Sticker Background
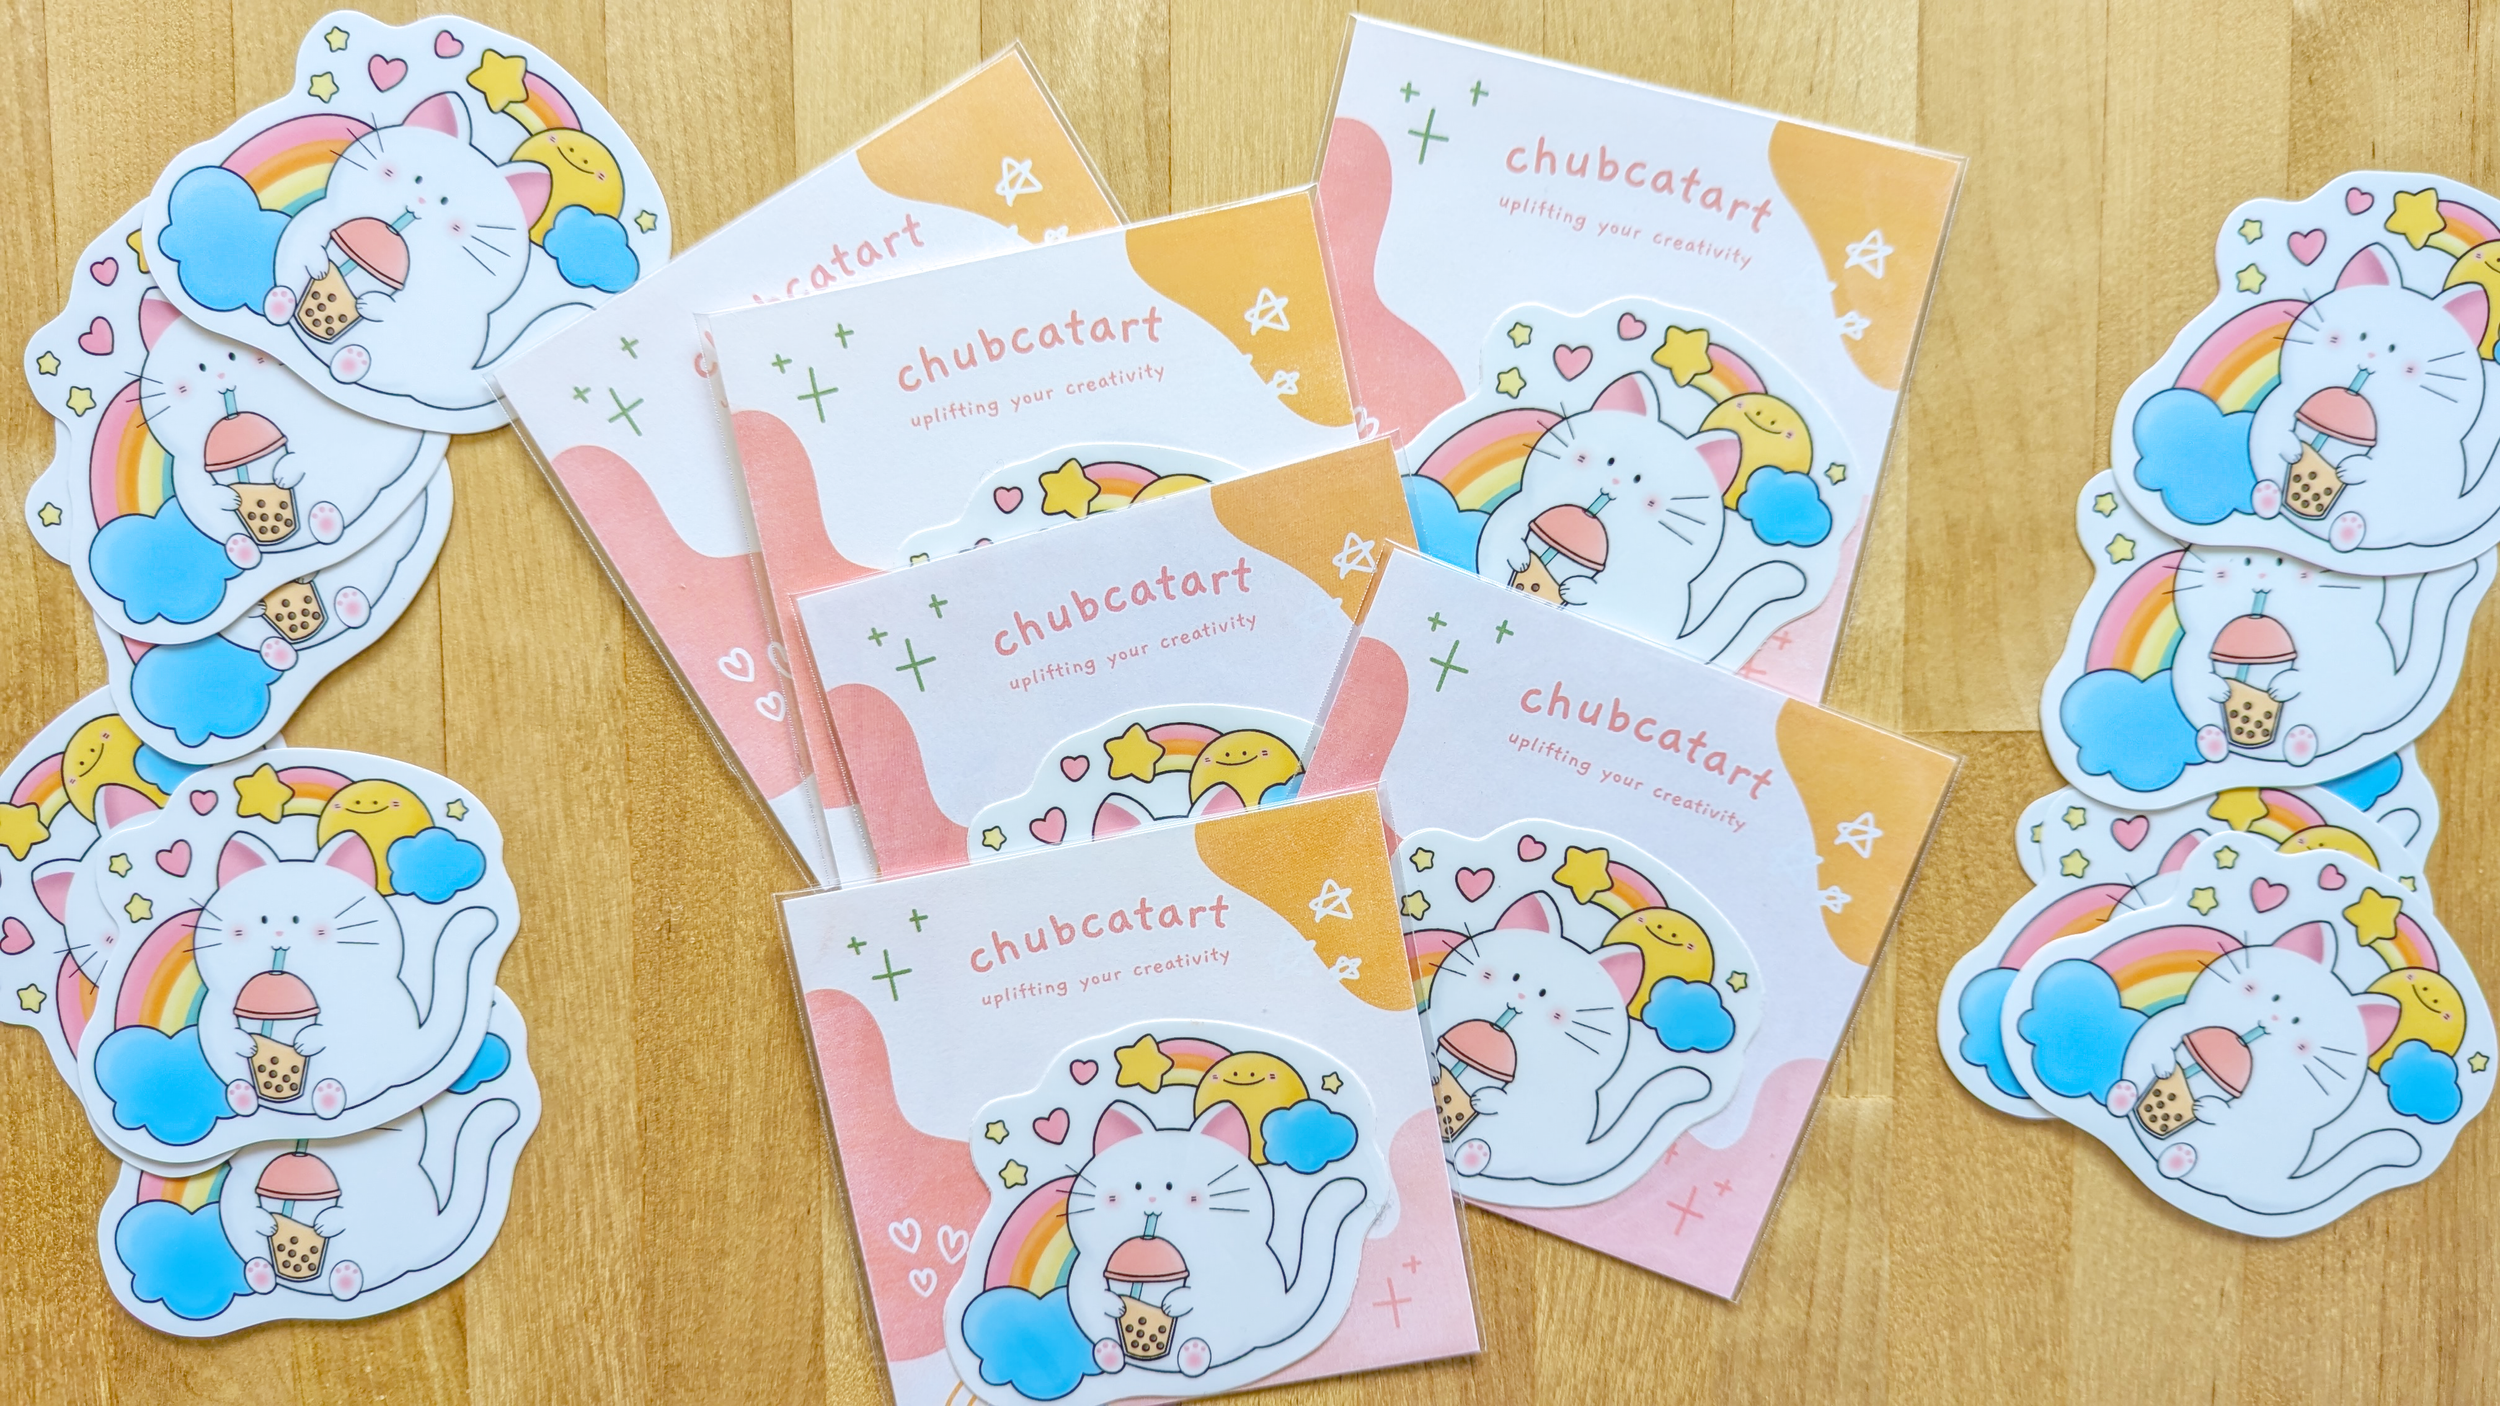
While not a critical process, I believe having a custom sticker background can complement your sticker and enhance the customer experience. For me, when customers receive my stickers, I want them to not only get a sense of my brand, but also to feel good about what they purchased. Adding a sticker background can be a unique way to show your style and personality. Plus, you can add your business card in the back, so everything is in one place!

I designed my sticker background using Canva Pro and sized them to 4”x4” so my 3”x3” sticker can fit inside. I placed four backgrounds on a letter sized (8.5”x11”) sheet and printed them at home using white cardstock paper. I also added bleed marks in Photoshop to provide guidelines for clean cuts using a paper cutter.

Step 4: Package Stickers
Once you have your sticker background ready and cut, you are ready to package them! I share a quick process of how I package my stickers below:
Be sure to have clear, plastic, sealable bags ready for packaging. I purchased the clear bags on Amazon at 4”x6” size. If you do decide to package your sticker without a sticker background, ensure the plastic bag will not be too long when folded and sealed over your sticker. For example, if you have a 3”x3” sticker, a 4”x4” clear plastic bag can work to seal your sticker neatly.

As an optional step, you can also include your business card and a logo sticker in the back of the package. This can really make receiving your stickers a positive experience and that you have thoughtfully considered what the back will look like, which many sellers do not think about. In the back of my sticker package, I included my 2”x2” square business card and stuck my 1”x1” logo sticker over the sealable tape.

You are now ready to create and package your stickers from scratch! Let me know what stickers you are making in the Comments section, I would love to know!
Happy creating,

Interested in working with me? Fill out the Contact Form.
Check out my portfolio or my latest work on my IG @chubcatart!
For brand collaborations, check out my media kit.

If you are looking to build a strong online presence with your art, you are in the right place! Here at ChubCatArt you will find resources that will help you stand out and be seen in your art journey. Take the leap and let’s get creative together! Read more.
You might also enjoy…


