How to Make a Halloween Banner in Procreate

Banners are one of those decorations that can really add a nice touch to whatever holiday or occasion you are celebrating. Because of their size, flexibility, and ability to cover a space, banners can be a fun way to decorate a wall, a fireplace, a table, and more. I personally use more than one banner to decorate my space for the holidays. As an alternative to buying a banner, I will show you how to make your own banner from Procreate.
Making your own halloween decorations can be fun and exciting. You can draw whatever you want and use colors you love in your decorations. You aren’t restricted to just drawing pumpkins and ghosts - you can mix other characters and elements into your design. Add a splash of your personality and whatever inspires you too. If you can’t draw art, you can also mix and match colored construction paper and perhaps even challenge yourself by switching up the drawing medium to felt paper. The choices are truly limitless.
Below are the tools I use to make my banner from scratch:
Ipad with the Procreate app, paired with an Apple pencil
White cardstock paper (for print)
Hole puncher
String
Scissors

Below is a quick video tutorial if you are a visual learner!
Step 1: Set Up Your Procreate Canvas
Prior to drawing your banner art, be sure to set up the canvas in Procreate so it is in the appropriate dimension and resolution to draw and color profile for print later on. I recommend creating a square canvas at 7 inches by 7 inches in 300 dpi with a CMYK color profile. The size of each banner art can be roughly 6 inches by 6 inches. I find that this is an ideal banner art size so it isn’t too large or too small when viewing near or far, and the details can still be seen at a distance.
Also, in case you feel the size is too large, you can always scale the banner art down to your preferred size. It is always better to start big with the ability to go smaller later on because the resolution will remain the same when scaling down. Going from the small to big will impact the resolution and details, resulting in a banner art that can be blurry, even at a high resolution.

Step 2: Create Your Banner Art
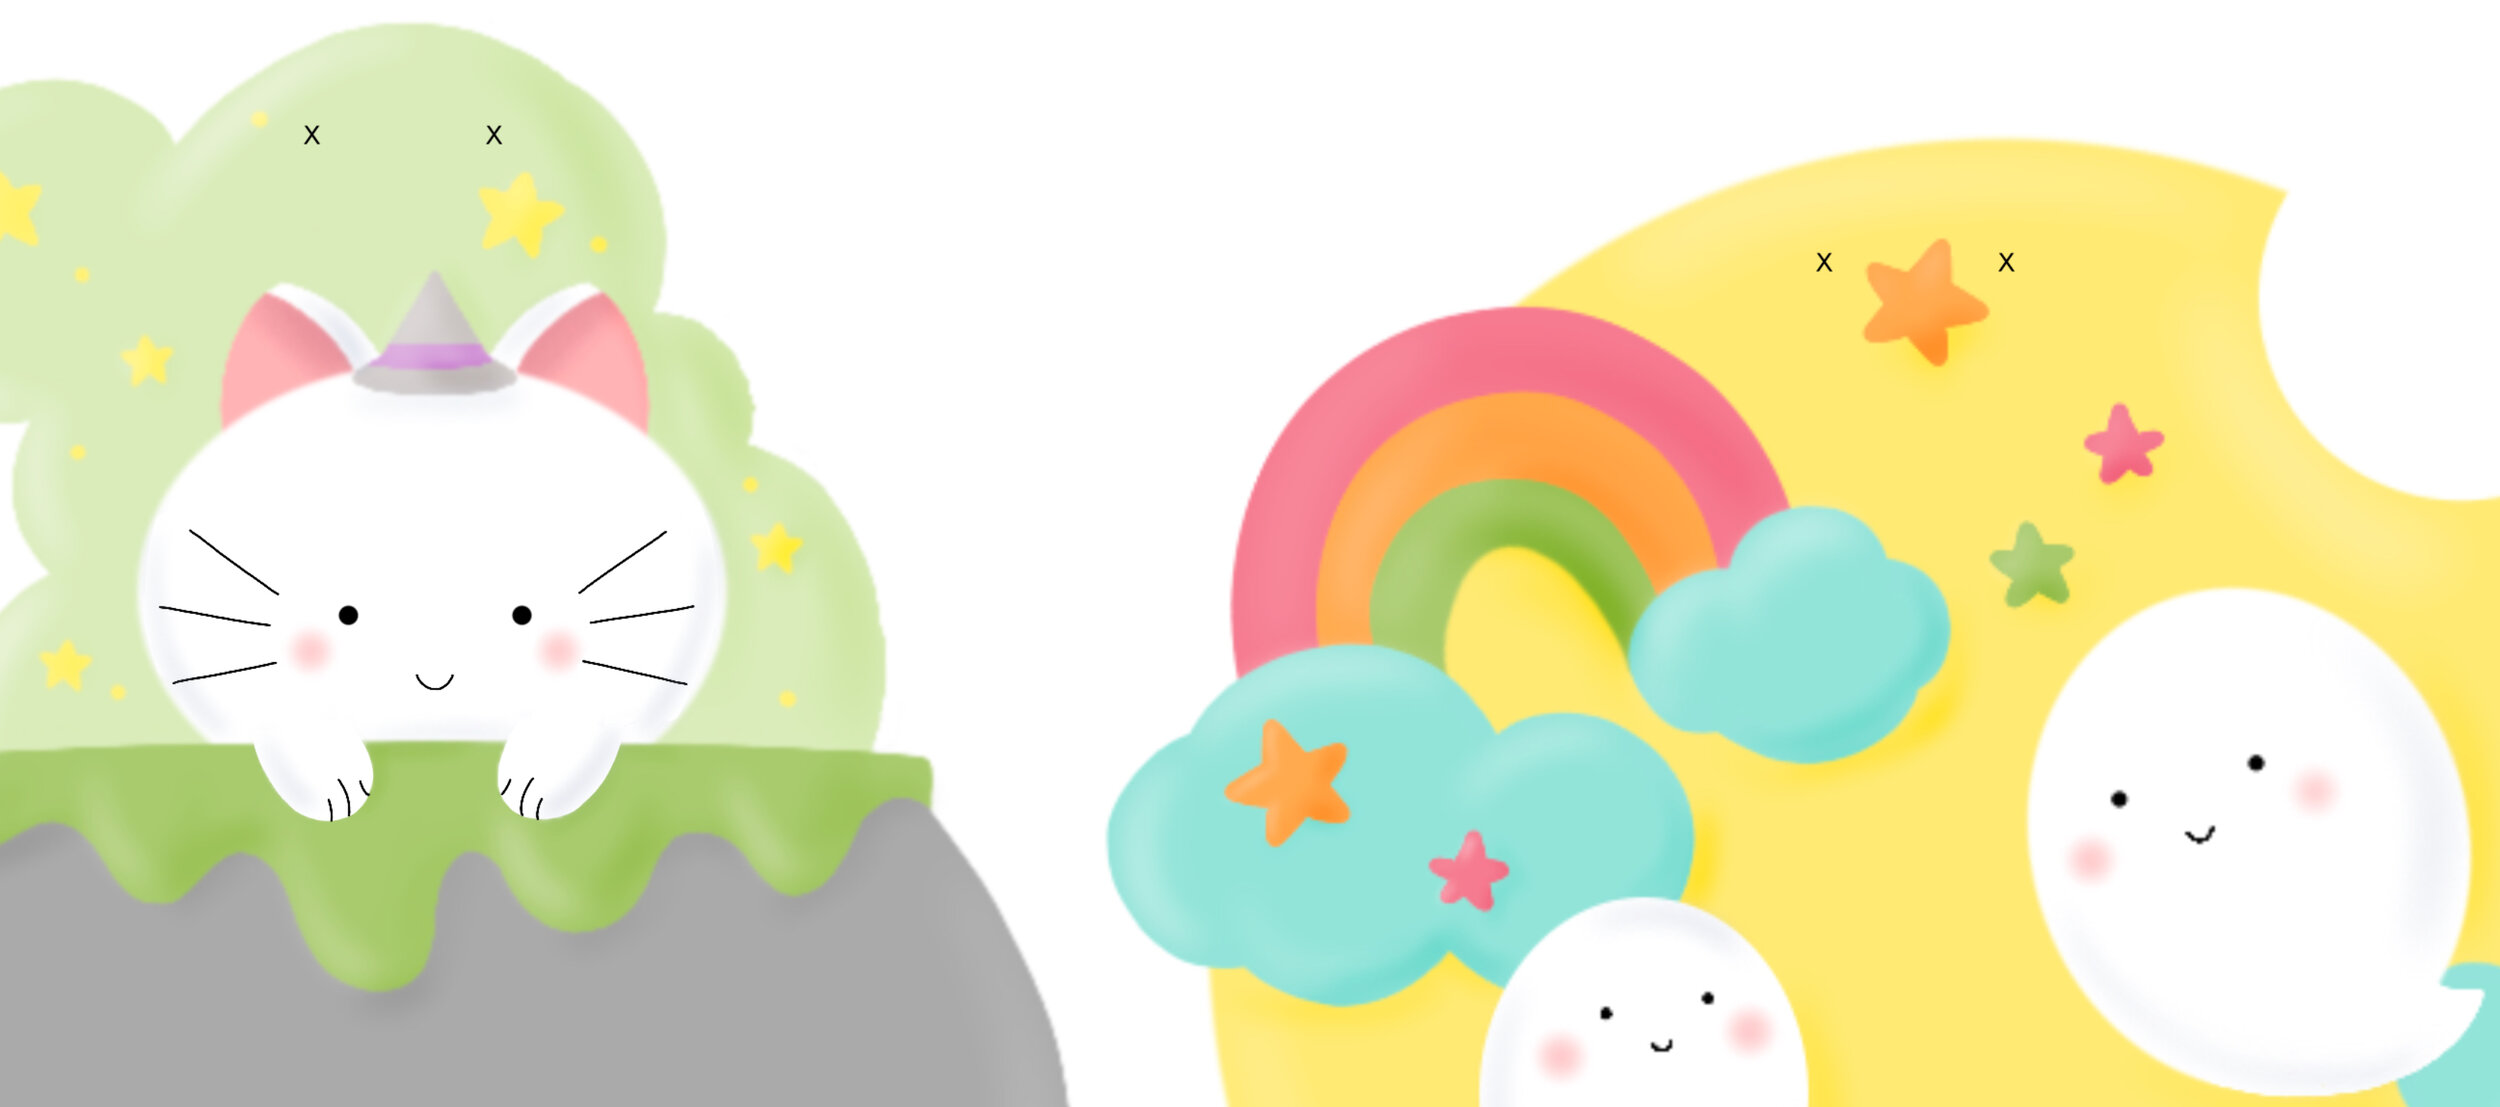
Once you have the canvas properly set up for your banner, you can begin creating your banner art. You can keep the banner simple that says “Happy Halloween” or have cute Halloween elements drawn to your style, colors, and personality. The banner design is entirely up to you! Keep in mind that if you are planning to hang your DIY banner, ensure that it goes with the decorations or the theme you already have in the space.

I personally made ten individual banner art designs for my Halloween banner. This is a good number to cover a wide space. You can create as many or as little as you want, but I recommend the number to make should be an even number, such as 6, 8, or 10. This is so that the banner will look visually appealing with an even amount of art from afar.
Step 3: Add Markers and Print Your Banner Art
Next, bring your banner art into a graphic design tool, such as Photoshop or Canva, for print. Since I am printing from home, I set up my print size to be 8.5”x11” and I was able to fit two individual banner art into one sheet. Feel free to adjust the banner art accordingly to fit to the size you would like to print as. Also, if you have white color along the edge of your image, set another color such as light gray as the background so you can easily see where to cut later.
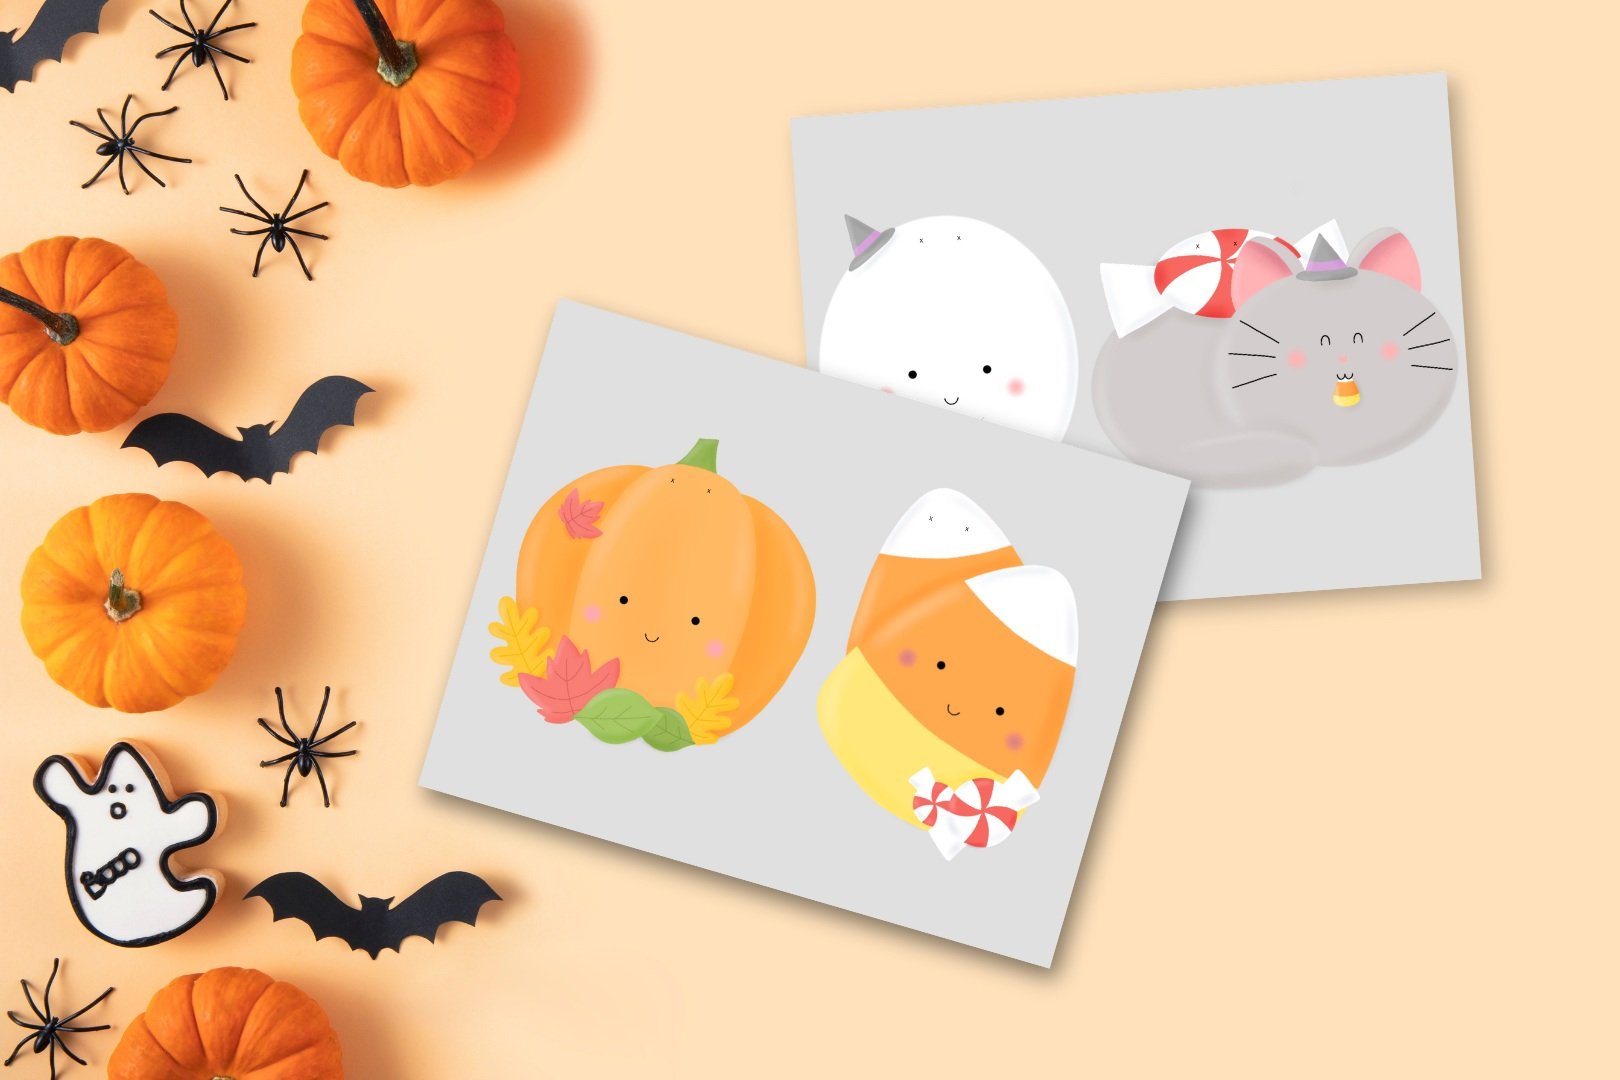
As a bonus tip, I recommend adding two little “X” to the banner so you have an idea of where to place your hole puncher later.
Review all the images and make final adjustments before printing them on white cardstock paper. It is ideal to use a heavy cardstock paper so the banner will not be too flimsy and be sturdy enough to not break easily. Remember to properly set your printer to take cardstock paper and switch it back to plain paper when you’re finished printing.
Step 4: Cut and String Your Banner Art
Once your banner art is printed, cut them individually. The cleaner the cut, the better it will turn out. Admittedly, the cutting process can be a bit tedious so do take breaks in between to let your hand rest.

When you have your banner individually cut, use a hole puncher to make your banner holes. Lastly, use a cotton fabric orange string to prevent the printed imagery from sliding or moving when they are hanging in the banner. The cotton fabric adds friction and secures the print without the need to add tape in the back.
Have fun with your decoration designs! It is incredibly rewarding to craft something of your own that fits your style and personality. I hope making your own decorations help reduce some stress and anxiety for you. Your final designs don’t have to be perfect, just be proud you were able to do it and make the banner in the first place. With some time and experience, you can refine your process and improve your techniques.
If you don’t have time to make your own Halloween banner, feel free to use the five-piece banner set to decorate your home. They are letter-sized at 8.5”x11".”

Links to the PDFs are right here:
Let me know if you have any questions about making DIY banners in the Comments section, I would be more than happy to help! If you use my free printables, be sure to tag me on Instagram @chubcartart so I can give you a shoutout too!
Happy creating,

Interested in working with me? Fill out the Contact Form.
Check out my portfolio or my latest work on my IG @chubcatart!
For brand collaborations, check out my media kit.

If you are looking to build a strong online presence with your art, you are in the right place! Here at ChubCatArt you will find resources that will help you stand out and be seen in your art journey. Take the leap and let’s get creative together! Read more.
You might also enjoy…